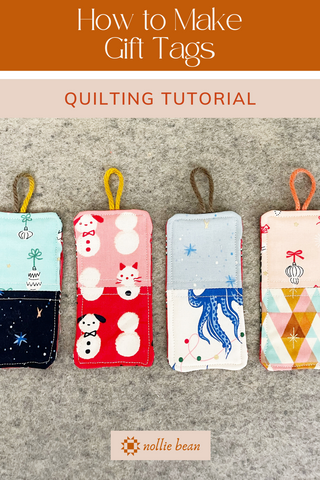
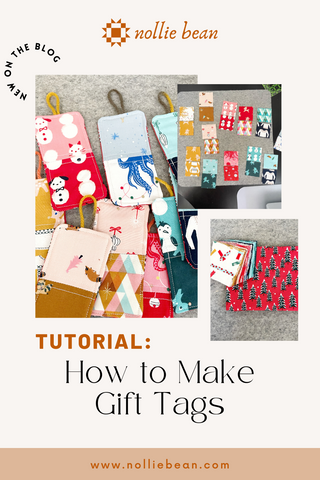
Tutorial: How to Make Gift Tags

Start Simple: Free Tutorial to Make Gift Tags with Ease
Do you have a mini charm pack or festive fabric scraps that you’re not quite sure what to do with? Or maybe you’re looking to liven up your holiday gift-giving with handmade gift tags? Then this tutorial is perfect for you! We’ll walk through simple step-by-step instructions for making uniquely designed gift tags that will make your presents stand out under the tree.
Gather Your Materials
Before you begin creating your own custom gift tags, it's important to gather all the materials you'll need for this fun and festive project. Here's a list of the essentials you'll need to get started:
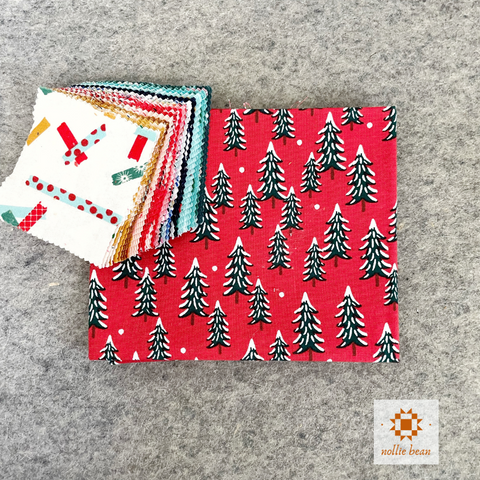
- Mini charm pack or pile of scraps cut into 2 1/2” squares (front of tag)
- Batting scraps (cut into 2 1/2” x 4 1/2” pieces)
- Fat Quarter or large fabric scraps (cut into 2 1/2” x 4 1/2” pieces for the bag of the tag)
- Yarn or Ribbon for the hanging loop
- Scissors, pins, thread and your usual sewing supplies
Once you have all your materials gathered and ready, you'll be well-prepared to move on to the next step: choosing a design. With a variety of options and endless possibilities, let's explore how you can create gift tags that perfectly capture the spirit of the holiday season.
Choose Your Design
Layout all of your 2 1/2” squares and pair them up. This is the fun part - let that creativity flow! Do you want your tags to share a color theme or simply be scrappy and colorful?

I’m using a mini charm pack to sew my gift tags so they all have a similar theme. If you are using directional fabric, like me, just be sure to be careful with the fabric orientation as you begin to sew your tags in the next step.
Sew and Quilt the Tag
With your design chosen, you're now ready to move on to the next step. Begin by sewing your 2 1/2” squares together. You can knock this step out quickly by chain piecing! Always sew with a 1/4” seam and with your fabrics right sides together. You can press your seams open or towards the darker fabric.
Next, grab your batting scraps that you’ve cut into 2 1/2” x 4 1/2” pieces. Line up the batting scrap with your gift tag and quilt your tag. Note: I found these pieces small enough that basting was not necessary; however, if your pieces are moving around on you, grab a safety pin or some spray baste.
Then, quilt as much or as little as you like. I opted for very minimalist quilting with only a couple lines near the seam. But….feel free to get creative with your stitching. You can experiment with different stitches your sewing machine offers or practice your hand quilting with some embroidery thread.
Once your tags are sewn and quilting, it’s time to finish them!
Finish the Tag
This final step will give your gift tag a polished look that your friends and family will love to receive!
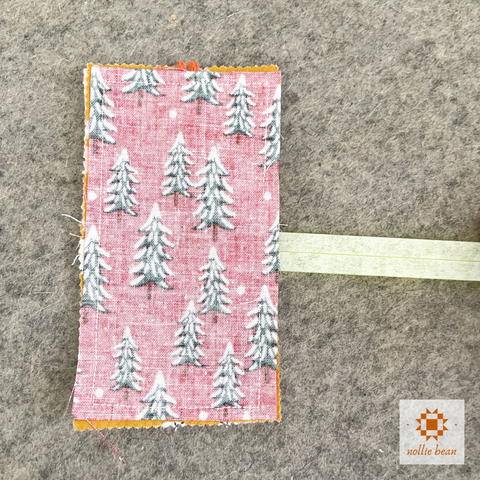
Gather up the large fabric piece that was cut to 2 1/2” x 4 1/2” and your yarn or ribbon. Begin by taking your yarn or ribbon and cutting a small piece that is about an inch longer than you would like the loop to be.
With your gift tag, right side up, place the loop on top of it (being mindful of fabric orientation) with some yarn or ribbon ends sticking up past the tag.
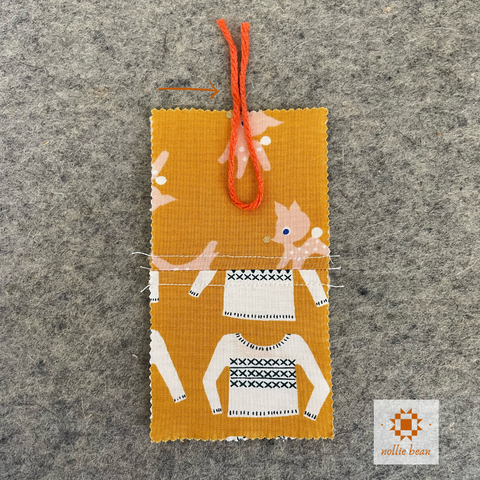
Then, place your large piece of fabric, right side down, on top of your gift tag. Pin all pieces in place, ensuring your loop is also secured.
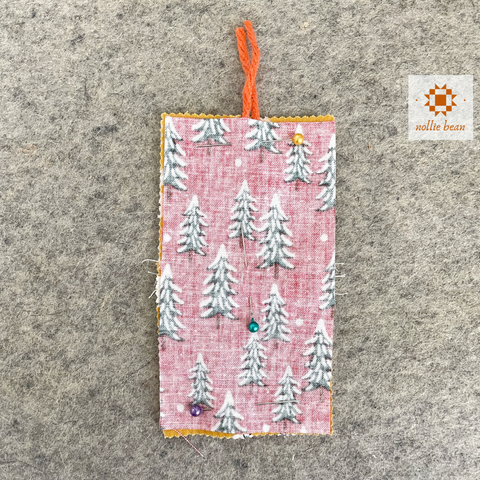
Begin sewing down one side of the tag, using a 1/4” seam, and sew nearly all the way around the tag. Leave about an inch open that you can turn your tag right side out through. Back stitch a couple of stitches at both the beginning and end points.
Then, turn your tag right side out through the space that you left. Use a pencil or chop stick to push the corners into a nice point. Tuck that seam allowance back in that space as this will be sewn closed in the final step. Then press your gift tag.
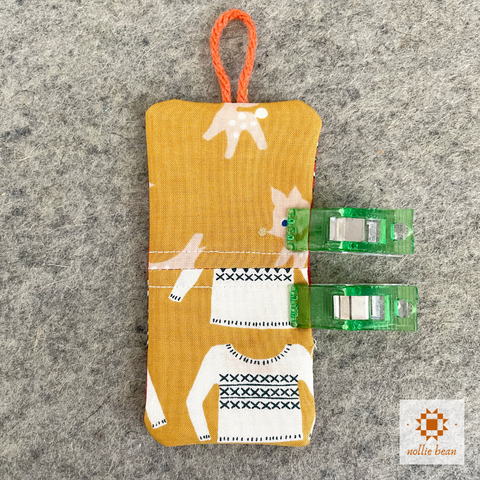
Finally, top stitch all the way around the perimeter of your gift tag. Sew as close to the edge of the tag as you would like and ensure that you are at least 1/4” away from the side - this will securely close the space left for turning your gift tag.
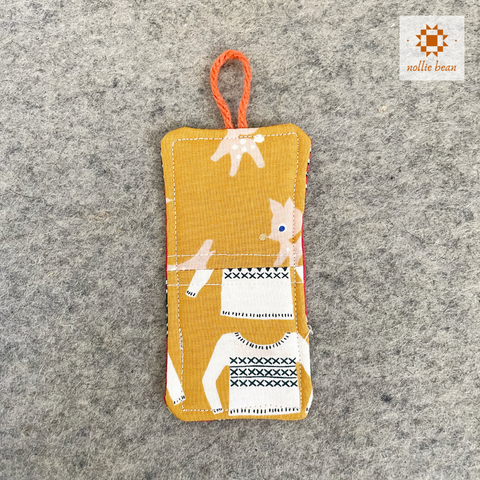
And just like that you have a custom gift tag, perfect for all of your holiday gift giving!!
Attach to Your Gifts
Once you have completed your gift tags, it's time to put them to use and attach them to your presents. This step will not only add the perfect finishing touch but also add a personal and thoughtful element to your gift giving.
You can use a Sharpie or a fabric pen to write your gift recipients name on the gift tag. Use the loop at the top with some extra yarn or ribbon to secure the gift tag to your gifts - or you can use some double sided tape to attach your gift tag.

Now that you have learned how to create beautiful gift tags and attach them to your presents, you are ready to spread joy and delight with your thoughtful and handmade creations. Your recipients will appreciate the extra effort and personalized touch that only a handmade gift tag can provide.
Yay!!! I’m so excited you found this tutorial Nancy & Jennifer!!!
Very cute idea. Running to my sewing room💖
Very cute idea. Running to my sewing room💖
Very cute idea. Running to my sewing room💖
The creative juices are flowing!! I just finished making Xmas presents. Your gift tags really interest me!! I received 3. 1 yard Xmas fabric cuts!! I’m going to see what I can do!!
Thank you so much!!