Harmont Quilt and Binding Tutorial

I have two last Harmont Quilt samples that I made as part of the pattern release, and I can’t wait to tell you about them!
You can get your copy of the Harmont Quilt Pattern here!!
One of my favorite ways to save a little money when quilting is scrappy binding! This pattern leaves the perfect amount of fabric left after cutting to use as scrappy binding - or save those 2 1/2” strips for another project!
I’m sharing how I make my binding, including a video tutorial at the end of this post! But, before we get into the nitty gritty, let’s talk about these quilts :)
Harmont Quilt - The First One
This green quilt is slightly different than the others. When I design a pattern, I start by making a baby sized one to see how I like everything, and well, I didn’t like how wide the sashing was. This quilt has 3 inch sashing rather than the 2 inch sashing in the pattern.

I grabbed a fun and bright mix of green and yellow fabrics for this quilt and backed it with a cotton bed sheet I had been saving for just the right occasion.
And, of course, this quilt has some scrappy binding - which we’ll get into below!

Harmont Quilt - The Three Colored One
I wrote the Harmont Quilt pattern to include an option for a three colored quilt where all blocks would be the same, rather than mixing and matching. And…it turns out this is one of my favorite quilts!
I went through my stash and found a simple black, white, and purple palette that is very pleasing on the eyes. They are bold colors, yet feel understated in the final product.

I backed this quilt with an Ikea duvet I purchased last year with a very simple black and white floral design. I’ve never been successful at limiting myself to so few fabrics for a quilt and I love how it came out.

I decided to keep that simplicity and bound this quilt using the same purple fabric from the quilt top.
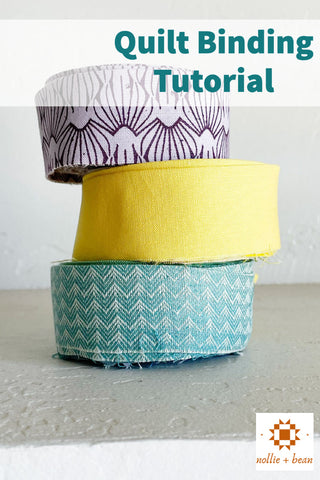
Quilt Binding Tutorial
And now for the main event - how to make quilt binding!
Making quilt binding can be broken down into a few easy steps:
- Cut 2 1/2” strips
- Sew strips together end-to-end using a 45-degree angle
- Cut and press seams
- Press binding (in half)
- Roll or fold binding (to be ready to attach it to your quilt)
A quick note on cutting: If you are using fabric with stripes or any kind of pattern like that, you will want to pay extra attention to which direction you are cutting your 2 1/2” strips!! You want the stripe or pattern to run along the short (2 1/2”) width of the strip - this will allow the stripe to show as a stripe. For example, you’ll see the yellow stripe in my binding strips below were cut with the stripe running the full length of the strip, if you then look at my quilt where that binding shows up, you’ll see what I mean. In this case, since I was going scrappy I was okay with that. However, if I was binding this quilt in just stripes, I would have cut it the other way.

First, cut out your 2 1/2” strips of fabric following the your quilt pattern. Then, you will sew the ends together using a 45-degree angle (check out the video below for a visual example).
Tip! If you are making scrappy binding, you’ll want to decide what order you will be sewing your strips in. Are you making a rainbow or an ombre / gradient shift from one color to another - or are you just going all-in on the scrap factor??
I like to lay my strips out to determine the order. For example, when I was making the binding for my green and yellow baby Harmont quilt, I used fat quarters and had two shorter 2 1/2” strips left over for each fabric. I wanted a gradient shift from yellow to green and then I wanted it to repeat with the second set of strips.
Once all of your strips have been sewn together, you’ll want to trip all of your seams to 1/4”. You can use a ruler for this or eyeball and cut with scissors.
Funny story - I spent years using my ruler and cutting the seams to a perfect 1/4” and then saw an instagram story where someone shared they preferred to cut theirs with scissors. My initial thought was “huh, that seems strange, wouldn’t it take longer?” But I gave it a try and haven’t gone back. So, I’d love to know, are you team scissor or team ruler??
No matter how you trim your seams, you will want to press them as flat as possible. I have a wool mat that I use when piecing and lets you get your seams FLAT! I also like to press my seams open.

Once your seams are pressed, it is time to press your binding. You will fold your binding in half - wrong sides touching - so that both sides of your binding display the gorgeous fabric you selected.
Then, once you have pressed your entire binding, its technically finished! You’ll just want to either roll it or fold it up in a way that lets you attach it to your quilt easily. I prefer to roll my binding and have often been asked about my binding rolls and how they are so tight. I share how I do it in the video, but I also roll them right away when the fabric is still warm from the iron.

Watch the video below for a quick visual on how I sew my binding strips together.
I just love finished binding rolls - and I can’t really figure out why they are so appealing to me. Am I weird? Do they have the same effect on you? I’m hoping I’m not alone…lol!
If you have any questions about making quilt binding that this post didn’t answer, I’d love to know!! Share in the comments.
