Tutorial: Quilted Coasters

Hi there! Are you looking for a quick project, a way to use up some small scraps of fabric, or maybe even a last minute gift? (If you’re making these to gift, there’s a few ideas at the end of this post to round out that gift!) These quilted coasters might be perfect!! I hope you enjoy making your set! Feel free to bookmark this page to easily come back to make more!
If you’ve been following along you know I’ve been on a mission to use my quilting scraps rather than let them pile up and accumulate. I’ve also been finding my son’s cups hanging out on surfaces they are not supposed to be on, and viola, another way to use up some scraps emerged :)
There’s also a scrappy tote bag tutorial if you have more scraps to sew up something fun with.
But, back to the coasters…. Let’s start off with what you’ll need to make your own! This tutorial is written with the assumption you are making a set of four. If you are making more or less, it will be very easy to adjust your required supplies.
Fabric Requirements and Supplies
- Fabric scraps to sew four 6 1/4” squares
- Four batting scraps measuring at least 6 3/4” square
- Four 6 1/4” squares of pieces of coordinating material for the backs
- Cutting mat
- Ruler
Make your scrappy coaster tops
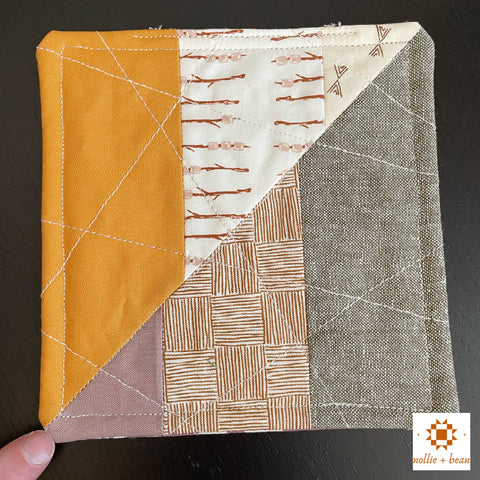
This is the fun part! Play around with your fabric scraps and sew them together until you have four 6 1/4” squares. I was making a Desert Cove quilt top and had four strip-pieced squares left over and decided to make some funky half square triangles out of them.
If improv isn’t your thing, you can also sew strips together or make some large half square triangles, or even stick with a whole cloth look by using some squares of a favorite print.
Quilt and trim your coaster tops
We will only be making half of a quilt sandwich for this part - and some really small ones at that. Place your scrappy squares, right side down, on a flat surface and line up the batting on top. Then baste with your preferred method. I tend to prefer pin basting for quilting; however, for smaller projects like this, I find spray basting easier.

Then quilt the two pieces however you’d like! I decided to sew some random straight lines in an abstract pattern to add to the scrappiness of my coasters. You can use a quilt guide or mark your pieces with a Hera marker to end up with perfect quilting or to test a design before sewing.
Once quilted, trim the excess batting from your 6 1/4” squares.
Sew your coaster together
Take one quilted and trimmed coaster square and one backing square and sew, right sides together, using a 1/4” seam using the picture below as your guide. IMPORTANT!! Make sure you leave a gap of a couple inches on one side. You will be pulling your coaster through this hole, so if you forget it you will be very sad. :(


Trim the excess fabric and batting from each the corners, being careful not to cut your stitches.

Repeat for all four coasters.
Turn your coaster right side out
Turn your coaster right side out through the space you left unstitched and use a pencil to push out all four corners. Then, lay your coasters flat and hand-press to smooth them out.
Now, you will sew the hole used to turn your coasters shut. You have two options here. You can hand sew the hole closed, which will not show and has a nicer look to it - OR - you can machine sew the hole closed. These stitches will show, but are a bit faster to complete.

I am personally okay with the stitches showing, so I machine stitched the holes closed. To do this, I switch to my clear foot to help me get as close to the edge as possible to make sure I am sewing through all of the layers needed. I also prefer to use binder clips rather than pins to keep everything in place.


Repeat this step for all of your coasters.
We’re almost there!! We’re so close - just one more step now! You’ll be ready to save surfaces all of your house in now time!
Topstitch and finish
Our coasters look like coasters now and technically can be used, but we’ll give them one final top stitch to help keep everything in place and add a little extra sturdiness to them.
Topstitch all the way around each coaster with a 3/8” seam (just a bit larger than 1/4” to make sure it is on the other side of the bulk from your interior seam allowance). When you get to a corner, leave the needle down then raise the foot and turn your coaster 90 degrees. Lower the foot and continue sewing. Sew until you’ve come all the way around the coaster and then back stitch a few stitches to keep everything secure.
Once you have top stitched all of the coasters you are finished!
The first set I made will definitely be staying here and should probably be Velcro’d to my son to always have handy since I find his cups everywhere in the house!!!
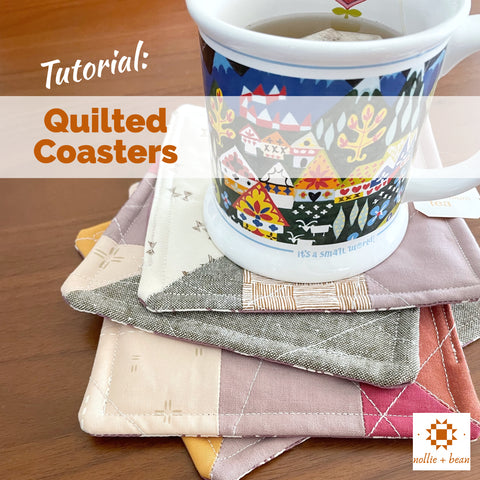
But a set of hand made coasters is also a great start to a gift - whether it be for a teacher, hostess, co-worker or friend, I think a set of hand made coasters would be great paired with a mug and some coffee or tea.
My son wants to gift his teacher a set of coasters paired with some soap and lotion - little does he know that is a very sweet self care gift theme :). We’ll be tying the coaster set together with some yarn or twine and building a gift bag with the other goodies.
If you’ve made a set, I’d love to know how you use your coasters! Share in the comments!


does it matter what type of batting you use?
Can you use the polyester batter? Is it absorbent and won’t get moldy?